
You turn the shower handle on a January morning in Shandon, wait the usual twenty seconds, and get lukewarm water that never quite warms up. Nothing broke overnight. That tank had been quietly warning you for months, through a low rumble you stopped noticing and a slightly higher power bill you blamed on the weather.
Most Columbia homeowners never touch their water heater until it stops working. It sits in a garage corner, a hall closet, or under the house in a crawl space, doing its job in silence for years. The trouble is that silence isn’t the same as health, and by the time a tank speaks up, the cheap fixes are usually behind you.
This guide covers how to maintain water heater systems in a Midlands home: what our local water and climate actually do to a tank, which tasks you can handle with a garden hose and an hour, and which ones genuinely belong to a plumber.
Why Water Heater Maintenance Pays Off in the Midlands
A storage tank works harder than almost anything else in your house. It holds forty to eighty gallons at a steady temperature around the clock, cycling on and off whether you’re home or on vacation. Heat, pressure, and dissolved minerals work against the steel lining every hour of every day.
Left alone, that slow wear shows up in predictable ways. Efficiency drops first, so the burner or element runs longer for the same shower. Then recovery time stretches, so the second person in the morning gets a colder rinse than the first. Eventually the tank floor gives out and you’re mopping up a garage or a crawl space.
Water heater maintenance isn’t complicated work. It’s a handful of small, repeatable checks that catch problems while they’re still adjustments rather than replacements. Homes that get that attention routinely stretch well past the point where neglected tanks fail.
What Columbia’s Water Actually Does to Your Tank
Here’s where a lot of advice online gets it wrong for our area. Search for water heater maintenance advice and you’ll find page after page warning about hard water and heavy scale buildup. That guidance was written for Phoenix and Indianapolis, not for the Midlands.
Columbia Water draws from Lake Murray and the Broad River Diversion Canal, and the utility reports hardness in the range of one to two grains per gallon. That’s classified as moderately soft. Scale still forms over time, but it isn’t the runaway problem that softener companies often suggest when they’re selling equipment.
That doesn’t mean local tanks get an easy ride. Our water and climate create a different set of pressures, and understanding them changes what you should actually be watching.
Soft Water and the Anode Rod Trade-Off
Every glass-lined steel tank contains a sacrificial anode rod, usually magnesium or aluminum. Its entire purpose is to corrode so the tank walls don’t. It’s the single cheapest part in the system and the one that decides how long the expensive part survives.
Soft water is gentler on heating elements, but it’s actually more aggressive toward that rod. Lower mineral content means the rod gives itself up faster, and once it’s spent, corrosion moves straight to the tank lining. Columbia homeowners often assume soft water means less to worry about, when the anode rod deserves closer attention here, not less.
Pull the rod at the three-year mark and take a look. If it’s pitted down to the steel core wire along most of its length, replacing it costs a fraction of replacing a tank.
Seasonal Sediment from Surface Water
Lake Murray and the Broad River are surface sources, which behave differently from wells. After heavy rain, or during seasonal turnover in the reservoir, treated water carries a bit more fine particulate than it does in a dry stretch. It’s perfectly safe to drink, and it’s not something you’ll notice at the faucet.
Inside a tank, though, those particles settle. They drift to the bottom and form a gritty layer directly over the burner on a gas unit or around the lower element on an electric one. That layer acts like insulation between the heat source and the water above it.
The popping and rumbling people describe as “the water heater sounds angry” is exactly this: pockets of water flashing to steam underneath trapped sediment. Annual flushing clears it before it hardens into a crust that a hose can no longer move.
Humidity, Crawl Spaces, and Slow Corrosion
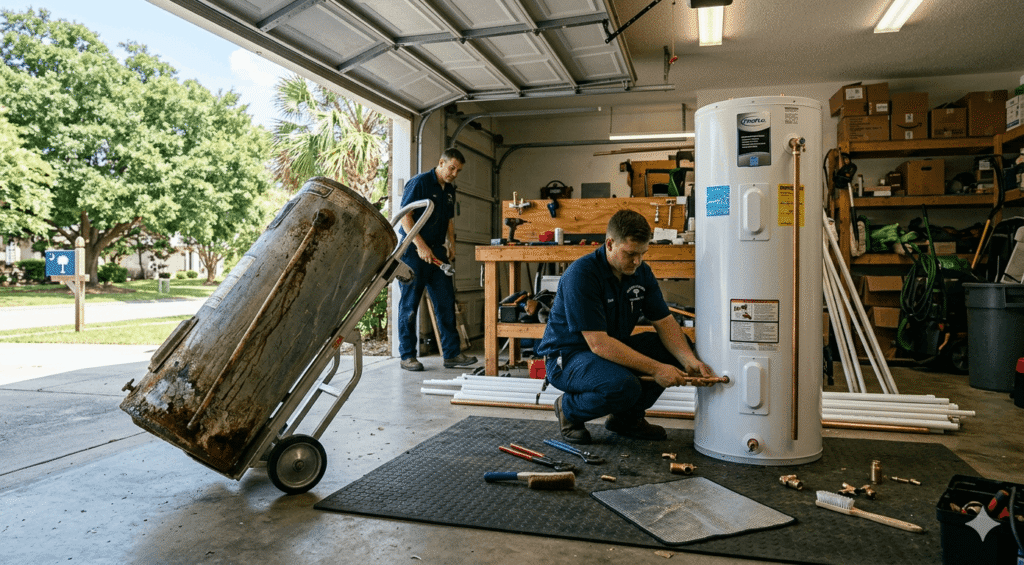
Columbia summers are long and genuinely humid, and a huge share of homes across Forest Acres, Cayce, and Northeast Columbia sit on crawl space foundations. Water heaters tucked into unconditioned crawl spaces or garages spend months surrounded by damp air.
That moisture attacks fittings, the flue collar, and the base of the tank from the outside in. You’ll see it as surface rust on the jacket seam, chalky white residue on the water connections, or flaking on the drain valve. None of it is dramatic on its own, and all of it is a signal.
Crawl space installations carry a second problem: nobody goes down there. A slow drip can run for months, soaking joists and insulation, before anyone notices a musty smell or a soft spot in the floor. A drip pan with a drain line and a battery leak alarm solves that gap for very little effort.
Your Water Heater Maintenance Schedule at a Glance
With hot water heater maintenance, knowing what to do matters less than knowing when to do it. Spreading these tasks across the year keeps any single session short enough that you’ll actually follow through.
How Often | Task | DIY or Pro |
Monthly | Visual check for drips, rust, standing water in the pan | DIY |
Monthly | Confirm the area around the unit is clear and dry | DIY |
Every 6 months | Verify thermostat setting near 120°F | DIY |
Every 6 months | Test the temperature and pressure relief valve | DIY |
Annually | Flush the tank to remove sediment | DIY or Pro |
Annually | Inspect burner flame, venting, and combustion air (gas) | Pro |
Annually | Descale a tankless unit | Pro |
Every 3 years | Inspect the anode rod; replace if depleted | Pro |
Every 3–5 years | Full inspection of connections, expansion tank, and shutoff | Pro |
Homes on well water, or units running above 130°F, should move the flushing and anode checks toward the shorter end of those intervals.
How to Maintain a Water Heater: Step by Step
The following water heater maintenance steps cover a conventional storage tank, gas or electric. Set aside about an hour the first time. Before you touch anything, locate two things: the cold water shutoff valve on the pipe entering the top of the tank, and the power source — the breaker for an electric unit, or the gas control knob for a gas one.
Work slowly. There’s no prize for speed, and the components you’re handling have been sitting undisturbed for a long time.
Step 1: Dial the Thermostat to 120°F
Manufacturers ship most tanks preset around 140°F, which is hotter than any household actually needs. Every extra degree accelerates mineral deposition and scalds faster at the tap. The Department of Energy recommends 120°F, and dropping from 140 to 120 trims standby losses noticeably.
On a gas unit, the dial sits on the control valve near the base and usually reads “Hot,” “A,” “B,” “C” rather than numbers. Split the difference between warm and hot, then measure at a faucet. On an electric unit, kill the breaker first, remove the access panels, fold back the insulation, and adjust both thermostats to the same setting.
Give the tank a few hours, then run the hot side at the fixture farthest from the heater and check with a thermometer. Adjust in small increments until you land near 120.
Step 2: Test the Temperature and Pressure Relief Valve
The T&P valve is the one component standing between a pressurized tank and a genuine safety event. It should open automatically if temperature or pressure climbs past safe limits, and it should stay firmly closed the rest of the time. A valve that’s been sitting for a decade can seize in place without any outward sign.
Testing takes thirty seconds. Put a bucket under the discharge pipe, lift the small lever on top of the valve, and let hot water rush out for a second or two before snapping it closed. You want a strong burst that stops cleanly when you release.
If nothing comes out, the valve is stuck and needs replacement. If it keeps weeping after you close it, the seat is fouled and it also needs replacement. Neither is a wait-and-see situation.
Step 3: Flush the Tank
This is the core of hot water tank maintenance and the task that returns the most for the effort. Start by shutting off the gas control or the breaker, then close the cold water inlet valve. Let the tank sit for an hour or two so you’re not fighting scalding water.
Thread a garden hose onto the drain valve at the base and run it to a floor drain or out toward the driveway. Open a hot faucet somewhere in the house to break the vacuum, then open the drain valve. Expect the first flow to look cloudy or rust-tinged — that’s the sediment doing exactly what you wanted.
Once the tank empties, briefly reopen the cold inlet to stir the bottom and push out what settled, repeating until the water runs clear. Close the drain, refill completely with a hot faucet open until the air clears, and only then restore gas or power. Never energize an electric element in a partly empty tank; it will burn out in seconds.
One honest warning: this is the point in hot water tank maintenance where old brass or plastic drain valves sometimes refuse to reseal once disturbed. If yours is original and looks corroded, having a plumber handle the first flush is the sensible call.
Step 4: Inspect the Anode Rod
Given how soft our water is, this part of water heater tank maintenance carries real weight in Columbia homes. The rod threads into the top of the tank, either under a plastic cap or beneath the hot water outlet on combination models. Freeing it usually takes a 1 1/16-inch socket and a breaker bar.
That’s where most homeowners stop, and reasonably so. A rod that’s been in place for years can be seized hard enough that the force needed to break it loose risks twisting the tank fitting itself. Clearance is often another obstacle — you need nearly the full height of the tank above the unit to pull a straight rod, which a closet or crawl space rarely offers.
If you get it out, judge it simply. A healthy rod still has substantial material around the core. A rod worn down to bare wire over more than half its length has finished its job, and the tank is now on its own.
Step 5: Check Connections and the Surrounding Area
The simplest water heater tank maintenance habit is also the cheapest: walk around the unit with a flashlight and take two minutes to actually look. Run a finger along the hot and cold connections at the top, checking for the green or white crust that signals a slow seep. Look at the seam where the jacket meets the base for streaking or rust.
Check the drip pan if there is one, and confirm its drain line is clear rather than plugged with debris. If your tank sits in a crawl space or a finished area without a pan, adding one is straightforward and buys you early warning on a leak that would otherwise go unnoticed for months.
While you’re there, clear anything stored against the unit. Cardboard boxes, paint cans, and stacked storage block combustion air on gas units and make a small leak much harder to spot.
Step 6: Insulate the Tank and Exposed Lines
Older tanks in garages and crawl spaces lose real heat to the surrounding air, and an insulating blanket rated for water heaters cuts that loss. Keep the material well clear of the burner area, the flue, the thermostat access, and any labels on gas models. Modern high-efficiency tanks are already well insulated and generally don’t need one.
Pipe insulation on the first several feet of hot and cold line is a smaller job with a quick payoff. It keeps delivered water hotter and gives exposed lines a measure of protection during the hard freezes that reach the Midlands every few winters.
Gas Water Heater Maintenance: The Extra Steps
Gas units carry everything above plus a combustion system, and that side deserves its own attention. This is the portion of gas water heater maintenance where careful observation from a homeowner is useful, but hands-on work belongs to a professional.
Reading the Burner Flame
Gas water heater maintenance starts here: pull the access cover and look at the burner while it’s firing. A healthy flame burns steady blue, possibly with small yellow tips, and sits evenly across the burner ports. It should look controlled rather than lazy.
Mostly yellow or orange flames, flames that lift away from the burner, or a flame that flutters and rolls out toward the opening all indicate incomplete combustion. Causes range from a dust-clogged burner to restricted combustion air to a venting problem. Any of them can produce carbon monoxide, so shut the unit down and get it looked at rather than experimenting.
Inspecting the Vent
Follow the flue from the draft hood up and out. You’re looking for sections that have slipped apart, screws that have backed out, visible rust holes, or any downward slope where the pipe should be rising. Soot around the draft hood is a red flag that exhaust has been spilling into the room.
Combustion air matters as much as exhaust. A gas heater in a small closet or a tight garage needs adequate air to burn properly, and homeowners often unknowingly cut that supply by weatherstripping a door or stacking storage against a vent grille.
The Pilot and Thermocouple
A pilot that repeatedly goes out usually points to a weakening thermocouple, the small sensor that tells the gas valve a flame is present. It’s a routine part and a common source of intermittent hot water complaints.
If you ever smell gas near the unit, don’t troubleshoot. Leave the house, call the gas utility from outside, and have the system inspected before it’s relit.
Electric Water Heater Maintenance
Electric water heater tanks have fewer moving parts, which makes hot water heater maintenance a little simpler, though not optional. Flushing still matters just as much, since sediment collects around the lower element and forces it to work through a layer of grit.
Elements themselves are a wear item. If your hot water runs out faster than it used to, or the water feels warm rather than hot, a failed lower element is a common culprit. Testing requires a multimeter and a properly de-energized tank, so cut the breaker before any panel comes off.
Hot water heater maintenance on an electric unit should include the reset button behind the upper access panel too. A unit that trips repeatedly is telling you about a thermostat or element problem, not asking to be reset again.
Tankless Systems in Columbia Homes
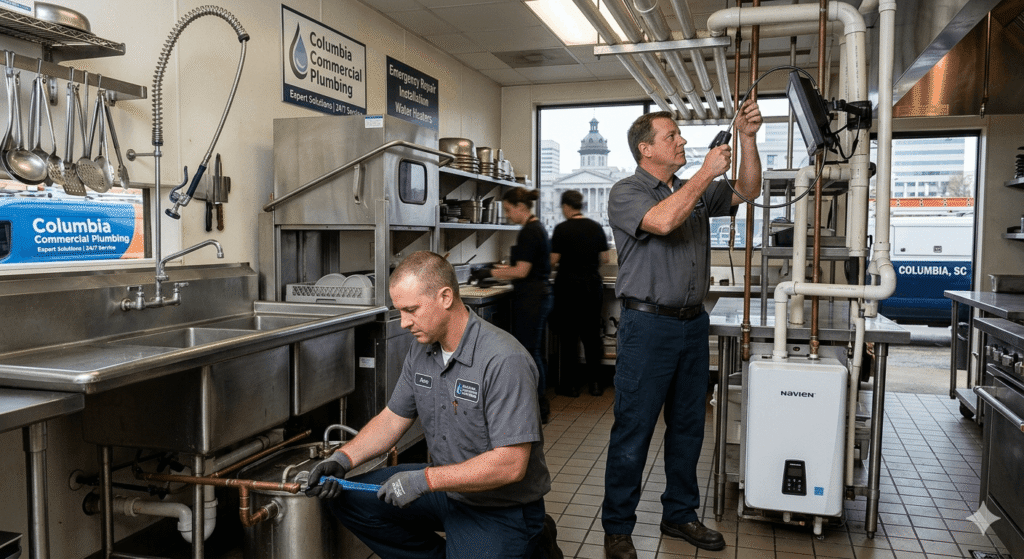
Tankless units are increasingly common across Lexington, Irmo, and newer Columbia neighborhoods, and they need a different water heater maintenance rhythm. There’s no tank to flush, but the heat exchanger accumulates mineral film that restricts flow and forces the burner to work harder.
Annual descaling circulates a food-grade descaling solution through the exchanger using a pump and the service valves installed at the unit. Alongside that, the inlet screen filter should be cleaned, the venting checked, and any stored fault codes read out.
Freeze protection is the local wrinkle. Tankless units mounted on exterior walls or in unconditioned crawl spaces rely on internal freeze protection that only works with power supplied. During a hard freeze with an outage, an outdoor-mounted unit is genuinely at risk, and that’s worth planning for before December.
Tank vs. Tankless: What Each One Needs
The two systems ask for different water heater maintenance routines, and homeowners switching from one to the other are often surprised by the change.
Task | Storage Tank | Tankless |
Annual sediment flush | Yes | N/A |
Annual descaling | No | Yes |
Anode rod inspection | Every 3 years | Not applicable to most models |
Inlet filter cleaning | No | Yes |
T&P valve test | Every 6 months | Yes, where equipped |
Venting inspection | Gas models | Yes |
Freeze exposure concern | Moderate | Higher on exterior installs |
Warning Signs That Need Attention Now
Some symptoms mean it’s time to schedule service rather than wait for the next seasonal check. Rusty or brown hot water, especially when the cold side runs clear, usually means the tank lining is failing from the inside.
Rumbling, popping, or crackling during a heating cycle points to hardened sediment. Any moisture at the base — even a damp ring that dries between checks — deserves investigation, since tanks rarely fail all at once. So does a sulfur smell in the hot water only, which often traces back to a depleted anode rod reacting with bacteria in the tank.
Water that runs hot then cold, a burner that short-cycles, or a sudden jump in the gas or power bill without a change in habits all belong on the same list. These are the moments when maintenance on a water heater turns from optional into urgent.
Where DIY Ends and a Plumber Begins
Plenty of water heater maintenance is genuinely homeowner territory. Adjusting the thermostat, testing the T&P valve, watching for leaks, and flushing a tank with a healthy drain valve are all reasonable weekend tasks with basic tools.
Other jobs aren’t worth the gamble. Anode rod removal on a seized fitting, anything involving the gas control valve or burner assembly, venting corrections, element replacement, T&P valve replacement, and tankless descaling all carry real consequences when they go sideways. The failure modes range from a flooded crawl space to a combustion hazard.
There’s also the matter of what a trained eye catches in passing. Thermal expansion problems, an undersized or waterlogged expansion tank, improper venting from a previous installation, and pressure issues in the incoming supply rarely announce themselves to a homeowner — but they quietly shorten the life of every tank that follows.
Keeping Ahead of Columbia’s Seasons
Our climate makes a seasonal water heater maintenance rhythm easy to remember. Spring is the natural time for the annual flush, before the summer stretch when incoming water runs warm and the unit coasts. Check the thermostat then too, since warmer supply water means you may be able to hold a comfortable output at a slightly lower setting.
Fall is the time to look at combustion, venting, and anything exposed. Incoming water temperatures drop through winter, which means longer burner cycles and more demand on a system that’s about to face its hardest months. Any weakness in the burner, flue, or elements will show itself under that load.
Before the first hard freeze, walk the crawl space or check the garage. Confirm insulation is intact on exposed lines, verify a tankless unit has uninterrupted power, and know where your main shutoff is. Ten minutes in November prevents the call nobody wants to make in January.
Frequently Asked Questions
How often should a water heater be flushed in Columbia?
Once a year suits most homes on city water, and flushing is the one hot water tank maintenance job with the clearest payoff. Because Columbia’s supply is moderately soft, scale accumulates more slowly than in hard-water regions, but surface-water sediment still settles. Well-water homes and units running above 130°F benefit from flushing twice a year.
Is Columbia, SC water hard enough to damage a water heater?
Not in the way most online guides suggest. City of Columbia Water reports hardness around one to two grains per gallon, which is moderately soft. The bigger local concerns are settled sediment, anode rod depletion, and humidity-driven corrosion on units in crawl spaces and garages.
Can I flush my own water heater?
Often, yes. The main risk is the drain valve — older brass and plastic valves sometimes fail to reseal after being opened. If your unit is well past a decade old or the valve looks corroded, having it done professionally the first time is the safer route.
What temperature should my water heater be set to?
120°F is the standard recommendation. It reduces scald risk, slows mineral buildup, and cuts standby heat loss, while still supplying enough hot water for typical household use.
How long does a water heater last?
Conventional tanks commonly run eight to twelve years, and tankless units often go longer. Consistent flushing and timely anode rod replacement are the two forms of maintenance on a water heater that most reliably push a tank toward the upper end of that range.
Why does my water heater make a popping noise?
That sound comes from water trapped beneath a sediment layer flashing into steam. It’s the clearest audible signal that the tank needs flushing, and left alone the deposits harden until a flush no longer removes them.
Does maintenance actually reduce my energy bill?
It does. Maintenance on a water heater pays for itself through efficiency: a sediment layer forces the burner or element to run longer to hit the same temperature, and that shows up directly on the bill. Clearing it, insulating the tank, and holding 120°F all pull in the same direction.
How do I know if my anode rod needs replacing?
It has to be pulled and inspected — there’s no reliable external indicator. A three-year interval works for most Columbia homes. A rod worn to the bare core wire along much of its length is finished and should be replaced before corrosion reaches the tank.
Do tankless water heaters need maintenance?
Yes. They need annual descaling of the heat exchanger, inlet filter cleaning, and a venting check. They also need freeze protection attention here, particularly for units mounted outdoors or in unconditioned space.
My water heater is in a crawl space. Anything different I should do?
Add a drip pan with a routed drain line and a battery-powered leak alarm, since a slow leak down there can run undetected for months. Check for surface rust more often than you would on an indoor unit, because crawl space humidity works on the tank from the outside.
Schedule Water Heater Maintenance in Columbia, SC
Knowing how to maintain water heater equipment yourself makes a real difference, and there’s no reason not to handle the basics. But the tasks that most directly determine how long your tank survives — anode rod service, burner and venting inspection, valve replacement, tankless descaling — are the ones that reward doing right the first time.
City Local Plumbing connects Columbia homeowners with plumbing professionals for water heater tank maintenance, annual flushing, anode rod service, and tankless descaling throughout Columbia, West Columbia, Cayce, Irmo, Lexington, Forest Acres, Blythewood, and Chapin.
Whether you’re staying ahead of a unit that’s still running well or acting on a noise you’ve been hearing for weeks, getting eyes on it now is far easier than dealing with a failed tank later. Reach out to schedule service and keep the hot water coming.
For anything outside water heater care, our plumber Columbia SC team covers drains, leaks, sewer lines and gas work across the Midlands.